Dot-style nail art is the easiest for beginners. Small tools such as dot sticks are used in this art. Every girl can get caught if she starts with a simple look. Connect the pink or red dots to make a flower. Whether the dots are the same size or random, the look will look fresh. A bobby pin or toothpick is also great for this design. Small round dots can be easily painted with them. The dot art gives a beautiful feel and makes the hands feel soft. Create a different pattern on each nail to add charm. Start with lighter colors to hide mistakes. Clean edges are important for a clean feel.
In this article
Dot art looks cute
Tap with clean lines
A sponge-soft mixture
Flowers with a toothpick
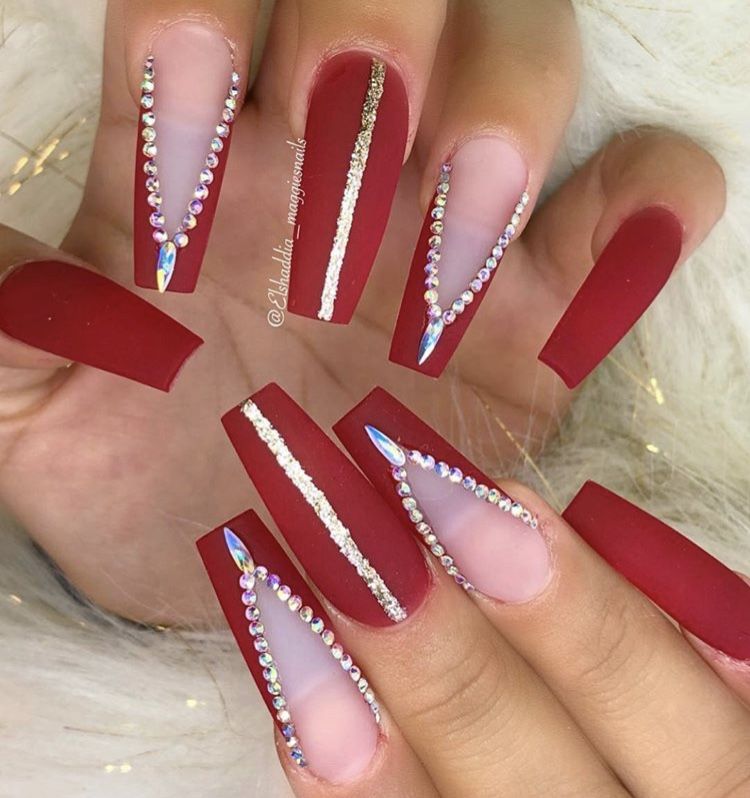
Stickers add glam
Seal the top coat
Charming Tap Art
Tape art makes perfect nails and adds sparkle to the style. This method creates clean lines and cool shapes. The first step is to apply the base tone and let it dry completely. Then cut the tape and stick it on the nails. Shapes like lines, crisscrosses, or squares look great. Apply a dull color to the tape to make the plan look strong.Utilizing Scotch tape or sheets of nail tape will work as well. Be beyond any doubt to utilize sharp scissors to make a clean cut. Take off the region secured with clear tape. Expel the tape tenderly so as not to harm the clean.
Matte Finish with Sponge Application
Correct use of base tone
Step one of sponge nail art is the base tone. In this trick, the white tone should be applied first. A white base makes the color pop, and the mix looks clean. Paint evenly on each nail to achieve a smooth look. It is important to use the sponge only after the base is completely dry. If the base is wet, the paint is mixed with a sponge.
How to apply color
Apply two tones to the sponge; pink and peach are the perfect combination. Press lightly to smooth the mixture. The edge of the sponge must be clean, or it will create dirt and patches. The charm of the gradient comes when the shades blend gently. The pressure should be gentle so that the layer is even and feels clean. Trying out new tones is always creative.
Final touch and shine
Apply a top coat to strengthen the shine and maintain the art. Ceiling gradient art gives both form and life. A unique blend is created on each nail, and it feels modern and fresh. Try new combos to make each style look different. This art is perfect for everyday glam or weekend events. A glossy coat makes the design look professional and durable.
Toothpick Detailing Technique
Toothpick nail art is perfect for an easy and fun style. Small shapes like flowers, swirls, and hearts are made in it. Flower petals are easiest to make using drops of paint. Mix two drops of color and make a petal shape. Use lighter tones like pink, white, or lavender. Make a center dot and create around the petals with simple hands. Be gentle with your hands when making the petals so that the lines don’t blur. Use less paint for a cleaner touch at each step.
Key Takeaways
Stickers save time and make the scene neater
The sticker must be applied after the base is dry
Dab the glitter with a sponge to get an even shine
Stickers and gloss last longer with a top coat
This style is easy, quick, and suitable for beginners
Conclusion
The fun of nail art starts with a simple style. Effort is necessary to bring charm and sparkle to every design. Keep tools clean and polish layers thin. Try with a gentle hand so that the shape is clean and bold. Confidence grows and skills improve with practice. Nail art is not just a game of looks; it is a form of happiness. Every girl can add her own unique touch to the design.Start with a gentle approach and gradually move up to the expert level. Find and enjoy the feeling of radiance in every effort. Nail art makes you feel strong and happy with self-care.
Frequently Asked Questions
What must have been done some time recently using the sticker? Before applying the sticker, let the base tone dry completely. The sticker slips off the wet base, and the grip is weakened. Dry polishing keeps the sticker smooth, and the lines are not blurred. If the base is not dry, the design looks messy and dull.
How to avoid sticker wrinkles? Press the sticker with a delicate hand, maintaining a strategic distance from bubbles. Apply it to a smooth surface and tenderly smooth the edges. Do not rush when applying the sticker so that it does not form a layer. Cut off the overabundance with sharp scissors to provide it a clean look.
What is the best way to apply sparkle? Pressing the glitter with a sponge will give an even and soft layer. Applying it directly with a brush can cause patches. The sponge controls the pressure, and the glitter stays in place. Dabbing never disturbs the base polish.
Why should a top coat be applied at the end? The top coat seals in both the sticker and the glitter. The gloss is also strong, and the design lasts for a long time. Without a top coat, the gloss sticks easily and looks dull. The gloss coat gives the art a proper touch and creates a smooth finish.
For what event do stickers and glitter look best? This style is perfect for parties, weddings, and daily glam. It applies quickly, and the final look is bold and stylish. Use soft stickers on casual days to add a little charm. For night events, sparkling glitter gives a bold look.